By Daniel M. East
One of the primary frustrations of many professional photographers, designers, and illustrators in the digital realm seems to be color consistency. While there are quite a few software and hardware calibration tools available today, coordinating all of your hardware so that they’re all on the same page can seem like a shot in the dark. With the US$599 Spyder3 Studio SR package from Datacolor (http://www.datacolor.com), this task just got a whole lot easier (and more accurate).
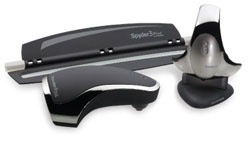
Datacolor presents the product in a beautiful package and storage case, which, in most instances, would be a worrisome sign; however, it’s appropriate. The Spyder3Studio SR includes everything you’ll need to properly calibrate everything in most design studios. One standout and well-thought-out feature is the ability to adhere the display sensor to the monitor, either by suction cup or counterweight, so it rests on the screen.
The Spyder3Elite software monitors your ambient lighting conditions and reminds you to recalibrate your display. The cables, software, cradle, storage pouch, cleaning cloth, and Pelican-style mini-briefcase are all included. Setup is surprisingly easy and screen calibration is complete within 5 minutes thanks to a step-by-step assistant or an advanced method in the software. The entire calibration process of the devices takes less than 30 minutes from start to finish.
Starting with the display, the software takes you easily through the process with a user-friendly interface after selecting the type of display (there’s even a laptop option). After launching the Spyder3Elite application and selecting your method of calibration, you have the option to either recheck your current settings or recalibrate your color pro le. Once you select that, a white box appears with an image of the sensor to ensure proper placement of the device on your screen. Click Continue and wait a few moments for the software to work. It’s magic and that’s it. You can toggle between the before and after once the process is complete as well. Your “previous,” “current,” and “target” levels display to complete the process. For best results, calibration should take place after your monitor is turned on for 20–30 minutes.
Calibrating a printer is a matter of connecting the Spectrocolorimeter directly to a USB port on your computer and launching the Spyder3Print SR software. (Note: USB hubs used in this test didn’t recognize the device.) Again, simple navigation through a clean interface allows for easy page setup via your operating system, as well as more helpful information about color management and the use of the Sypder3Studio SR package.
Before calibration, there are options to check print quality and media settings. Select your target mode, place the calibration tool on its cradle for white balance, and run your tests. The results, like the display calibration, are accurate and the print quality is excellent. Running the calibration twice may help provide best results and a basis for comparison.
The SpyderCube is simple and has white, gray, and black zones along with a chrome ball to analyze specular highlights. Think of it as a gray card on steroids. Shooting the properly situated SpyderCube in RAW mode under your desired lighting conditions and opening the image in your editing software allows for easy calibration using the eyedropper tools. The SpyderCube includes its own storage pouch and makes an impressive difference — especially when shooting for product photography and on full white or black backgrounds.
Rating: 10 out of 10
(This review is brought to you courtesy of “Layers Magazine”: http://www.layersmagazine.com ).
