Years ago I never would have thought I’d see the day when you could have a portable, RAID storage system for around 500 bucks. But that day has come to pass with CRU-DataPort’s ToughTech Duo (http://macte.ch/QP3qX), which works with two 2.5-inch notebook drives or solid state drives to back-up or store data.
It’s designed for professional photographers and digital media users while on location or in the studio, but, at its price point and relative portability (though it has some heft at 1.65 pounds with two drives installed), it will appeal to many users beyond its target audience. The ToughTech Duo — compatible with Mac OS X 10.5 o5 higher — maximizes storage in a mini footprint (3.5 x 6.26 x 1.34) and guards against data loss by writing the same information in real-time to both drives. The system can continue to run while the ToughTech Duo restores data on the hard drive, which is very handy.
Connecting to any host computer via FireWire 800/400, USB 2.0 and eSATA provides flexibility, while the eSATA interface option offers the fastest transfer rates. I used a FireWire 800-to-FireWire 800 connection from the ToughTech Duo to my iMac, and it offered plenty of speed.
One convenience is that the CRU-DataPort device — which runs very quietly — also supports bus power with an included FireWire cable, though the ToughTech Duo sports a multi-country compatible AC power supply (with swappable, removable “tips”). In fact, the ToughTech Duo can supply power over a FireWire cable while allowing a data connection over the faster eSATA port. A Kensington security slot is integrated for a lock to prevent theft.
Using the ToughTech Due is pretty easy, even for those not accustomed to working with RAID systems. Unique trays let you swap and mount drives quickly without tools and without voiding the warranty. But you can also screw down the drives in environments where additional protection is needed.
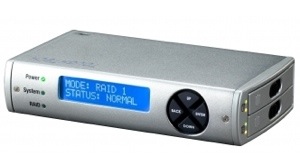
You can access SMART data (Self-Monitoring, Analysis and Reporting Technology) directly on the LCD menu to track drive temperatures and help prevent drive failure. Companion software (which is both Mac and Windows compatible) allows you to configure what temperature the warning LEDs turn on and/or the audible alarms sound.
However, as the folks at CRU-DataPort point out, a mirror, while it protects against hard drive failure, is only the beginning of your backup strategy. Keeping a separate copy of your data on another hard drive (in this case a third hard drive) will help protect you from data corruption and accidental file deletion.
You can do this with a ToughTech Duo in mirror mode. Simply unmount the volume to stop all write activity, remove one of the two drives, and then insert a third drive. You can remount your ToughTech Duo immediately as you work. The ToughTech Duo will rebuild your data to the third drive, restoring the full mirror.
The removed drive can be treated as a back-up that you can archive in a fireproof safe, off-site and away from the original data. You may access the information on your backup disk anytime with the Duo or another enclosure or drive dock; it becomes a standalone drive.
ToughTech Duo supports RAID 0, RAID 1 and a single drive, so you’ll have to decide what configuration best suits your needs. You’ll have to initialize all hard drives before you use ’em. You can’t add a drive to ToughTech Duo and access pre-existing data on that drive. The hard drive must be initialized by the unit and that zaps all data on the drive.
In RAID 0 mode, the unit will configure the drives in a “striped” RAID. This will split your data between the drives, offering faster performance and allowing you to use the full capacity of the drives in a single volume. However, this mode offers no protection for the data; if either hard drive were to fail, all data would be lost.
In RAID 1 mode, the unit will “mirror” the two drives for best data protection. In this mode, you will work with a single volume equal in size to the capacity of one drive. When you copy data to the volume, ToughTech Duo will simultaneously write the data to both drives. If one drive were to fail, your data would still be preserved on the other drive. After replacing a failed drive you can rebuild the RAID on the fly so that your data is once again redundant and secure.
In Single Disk Mode, the ToughTech Duo supports a single drive. The device is compatible with 2.5-inch SATA hard drives that are no more than 9.5 mm in height.
To remove and/or mount a drive:
Push the ejection button. The handle will swing open.
Remove the drive sled and swing the side panel out. c
Insert the drive with the label up.
Close the side panel. Ensure the panel is flush with the drive.
If you want to, though you don’t have to, secure the drive with the provided screws.
Slide the drive sled back into the unit. Close the handle and ensure the sled is securely in place.
Creating a new RAID is fairly easy, and you’ll need to use the LCD and interface buttons to do this. If you purchased your unit pre-configured you won’t need to worry about these steps:
Upon insertion of new disks, the LCD will read “Raid Error: not a RAID set.”
Press “Enter” on the front interface twice.
The LCD screen will display “Make a new RAID?”
Select “Yes.”
Select your RAID type (RAID 0 or 1).
The LCD screen will read “Will erase all data OK?”
Select “YES.” The RAID is now created.
To change the RAID type:
Press the Up button, for the “Change RAID Mode” screen.
Press the Enter button.
Press the Down or Up button to select the desired RAID type.
The screen will display “Will Erase all Data.” Selecting “OK” will result in the loss of all data on the drives (so make sure everything is backed up).
If you’re ready to continue, press Enter.
The new configuration will be selected and ToughTech will reboot.
ToughTech has been configured and is ready for operation. Follow the instructions for the
appropriate operating system usage instructions to initialize and format the drives.
In the event of a disk failure or removal for a RAID 1, the RAID will continue to function in a degraded state. You can add a new disk to the ToughTechT Duo to rebuild the RAID.
After the new drive has been detected ToughTech Duo will ask to add a new disk. Press the Enter button to select “Yes” to add the disk. The disk will be added to the RAID and the RAID will begin to rebuild. The LCD screen will display the percent complete for the rebuild. Rebuild times vary; a 1TB hard drive takes just over three hours to rebuild.
There are some things you should note. Never remove a drive from a RAID 0 as this will cause the loss of all data. In the event of a disk failure for a RAID 0, the RAID will be destroyed. Add a drive and then press the Up button to create a new RAID. Follow the display prompts to build a new array.
In the event of a drive failure in Single Disk mode, all data will be lost. Single Disk mode allows usage of a single hard drive. If a second drive is added later, it can’t be combined with the first disk, nor will it provide the option of two individual disks to be seen by the host computer. It will allow the option to create a new RAID using both disks, though this will destroy any data on both disks.
If you see your ToughTech volume mounted twice, the unit is probably connected to your Mac using both the eSATA and FireWire connections. When this is the case, the operating system may attempt to mount the ToughTech twice resulting in two volumes appearing. Simply turn off the ToughTech and unplug one of the connections to resolve the problem.
Some Windows users may justly complain that the ToughTech Duo doesn’t have USB 3.0 support, and Mac users may wish for Thunderbolt connectivity. But if you can live with the connectivity options (and most of us can) the CRU-DataPort device offers a fantastic, flexible solution for backing up and protecting our valuable data at home, in the officer or on-the-go.
Rating: 9 out of 10
— Dennis Sellers


